Ford Crown Victoria / Mercury Grand Marquis Rear Speaker Replacement / Upgrade Instructions
Introduction
The following is a step-by-step guide to removing and replacing/upgrading the rear speakers in your Ford 1994-2004
Crown Victoria and/or Mercury Grand Marquis. The instructions would probably also be equally applicable to a Lincoln
Towncar from the same years but this has not been verified. This is not a difficult job by any means and most folks
or even modest mechanical (electrical) ability would pile right in even without instructions. That said, even if you're an
accomplished do-it-yourselfer we have documented the process and some of what you'll find in these
instructions might save you some time and headache. The procedures outlined and the accompanying photographs
cover the process from start-to-finish and include some comments/ideas on upgrading the sound quality in your
car and a couple of tips and tricks you might find useful. Although not designed to be completely exhaustive
in nature (i.e., idiot-proof), anyone with even the most modest mechanical/electrical skills and some relatively
common tools should be able to readily accomplish the procedure described. If you read through the described
procedure before beginning and get concerned about your skills to accomplish the task then take your car to a
reputable stereo shop (if there is such a thing) and have them install your new speakers. If you do decide to
take on this procedure yourself please drop us a line and give us some
feedback on the
content of this site. We're always trying to improve our content and we love getting feedback from fellow
Do-It-Yourselfers
Getting Started
Factory speakers are a lot better than they used to be but you can still almost always improve the sound in your car
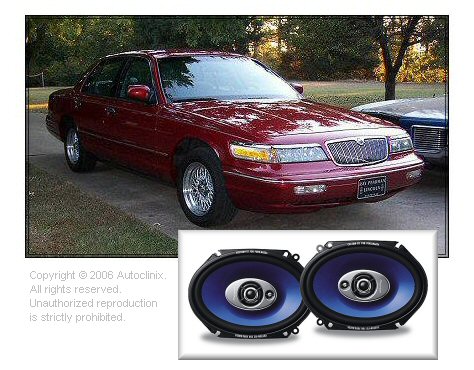
by installing some upgraded units. Although our 1997 Grand Marquis can accomodate either 6x9 or 5 1/4 to 6 1/2 inch (round) speakers
in it's rear deck, we chose to install some new 6x9 three-way (triaxial) units along with some upgraded door speakers as
well (installation instructions for the door speakers are covered here).
. Before buying any speakers (if you haven't already) be aware that our 1997 model car (and possibly other years) has 6x9
speaker cut-outs in the rear deck but uses 6x9-to-6 1/2 adapter plates to mount the stock, factory round speakers. Using replacement
speakers that are the same size as the round factory speakers makes the job a little easier but we opted to use 6x9 replacement
units in hopes of increasing he bass response (larger woofers).
There are a lot of places to buy new speakers and we wouldn't begin to offer a comprehensive list here. That said, we've
had good experiences with Crutchfield and Buy.com. For many Ford cars Crutchfield provides "free" wiring adapters to wire your
new speakers to your existing factory speaker wiring. That alone is good enough reason to look at Crutchfield's Sale/Closeout
section and see if you can find some speakers you like. They also offer an on-line fitment guide that helps you make sure
the speakers you buy fit your car (not as simple as it sounds since carmakers make many changes from year-to-year and even witin
the same model year. Of course, there are a myriad of on-line electronics vendors as well. We'll leave it up to you as to
where you get your speakers but here are the links to a couple of sources we've had good luck with:
We used some NOS 6x9 speakers we had in the shop but had just never used (we've had the speakers for years and hadn't even
the box opened). They probably came from Radio Shack before Radio Shack got out of the car stereo business if that gives
you any idea how long these speaker have been laying around our shop (and the relative quality of the speakers). That said,
in the end they sounded much better than the stock speakers and they were "free" so-to-speak. We chose to use Jensen 5x7/6x8
speakers in the front doors and thus redeemed ourselves a little from going the cheap-O route on the back deck.
Tools & Supplies
This is one of the simplest procedures on Autoclinix and it does not require many tools.
Although the list is short, if you the necessary tools at your side when you need them
it will save you some time.
Tools & Supplies You'll Need...
18mm socket
3/8" or 1/2" drive ratchet
Phillips screwdriver
Solder and a soldering iron (not needed if you have wiring adapters)
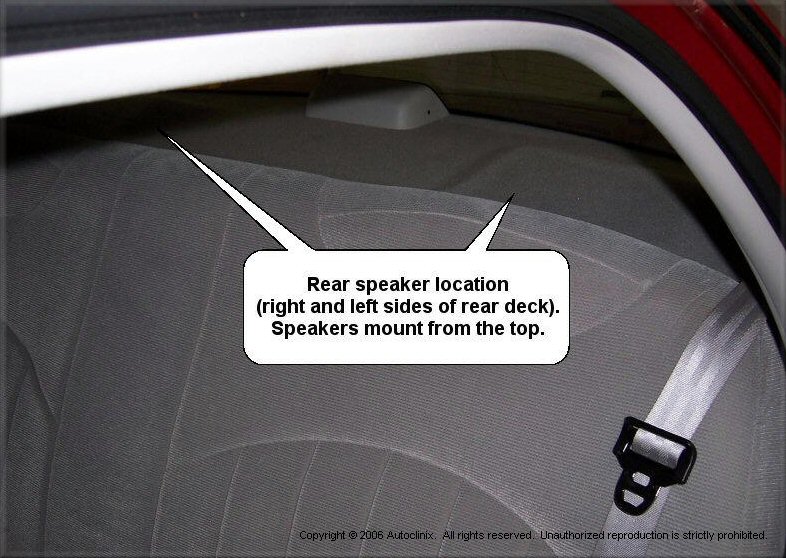
Looking Inside...
The picture below shows the location of the rear speakers. The speakers mount from the top (as opposed to
mounting from within the trunk). As such, we'll need to remove the rear seats and rear deck to get at them.
.jpg)

 The following is a step-by-step guide to removing and replacing/upgrading the rear speakers in your Ford 1994-2004
Crown Victoria and/or Mercury Grand Marquis. The instructions would probably also be equally applicable to a Lincoln
Towncar from the same years but this has not been verified. This is not a difficult job by any means and most folks
or even modest mechanical (electrical) ability would pile right in even without instructions. That said, even if you're an
accomplished do-it-yourselfer we have documented the process and some of what you'll find in these
instructions might save you some time and headache. The procedures outlined and the accompanying photographs
cover the process from start-to-finish and include some comments/ideas on upgrading the sound quality in your
car and a couple of tips and tricks you might find useful. Although not designed to be completely exhaustive
in nature (i.e., idiot-proof), anyone with even the most modest mechanical/electrical skills and some relatively
common tools should be able to readily accomplish the procedure described. If you read through the described
procedure before beginning and get concerned about your skills to accomplish the task then take your car to a
reputable stereo shop (if there is such a thing) and have them install your new speakers. If you do decide to
take on this procedure yourself please drop us a line and give us some
The following is a step-by-step guide to removing and replacing/upgrading the rear speakers in your Ford 1994-2004
Crown Victoria and/or Mercury Grand Marquis. The instructions would probably also be equally applicable to a Lincoln
Towncar from the same years but this has not been verified. This is not a difficult job by any means and most folks
or even modest mechanical (electrical) ability would pile right in even without instructions. That said, even if you're an
accomplished do-it-yourselfer we have documented the process and some of what you'll find in these
instructions might save you some time and headache. The procedures outlined and the accompanying photographs
cover the process from start-to-finish and include some comments/ideas on upgrading the sound quality in your
car and a couple of tips and tricks you might find useful. Although not designed to be completely exhaustive
in nature (i.e., idiot-proof), anyone with even the most modest mechanical/electrical skills and some relatively
common tools should be able to readily accomplish the procedure described. If you read through the described
procedure before beginning and get concerned about your skills to accomplish the task then take your car to a
reputable stereo shop (if there is such a thing) and have them install your new speakers. If you do decide to
take on this procedure yourself please drop us a line and give us some