Removal and Replacement Instructions
(steps 11-20 of 20)
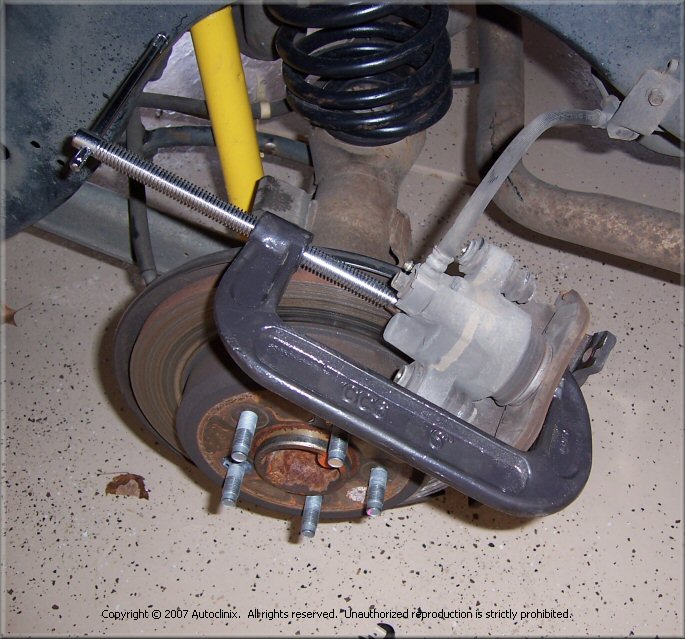
- Before removing the old inner brake pad you need to re-compress the brake caliper's piston. This is easier if
you do it before removing the old inner brake pad. Using a brake spreader or a large C-clamp (we used a C-clamp), re-compress
the piston by slowly pushing the inner pad IN. If you are using a C-clamp place one end of the clamp on the inner
brake pad and the other end on a flat place on the rear of the caliper (see picture below).
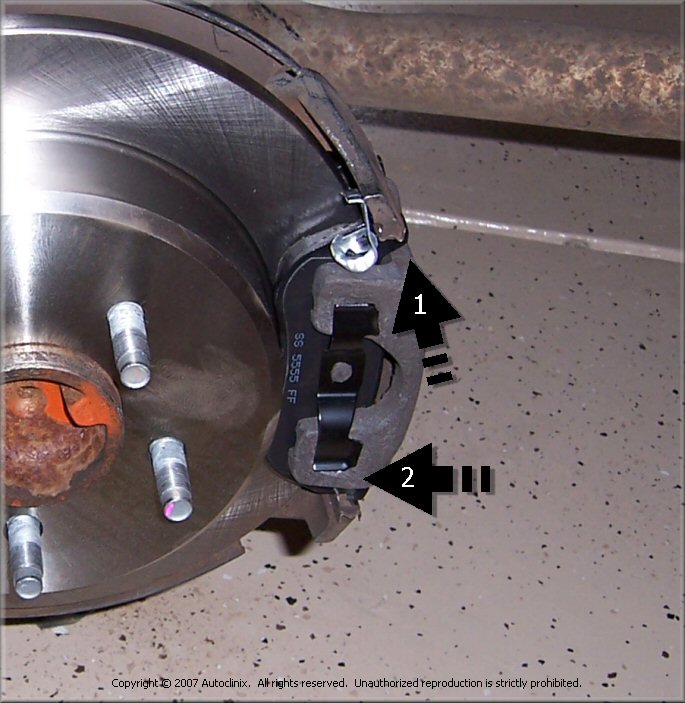
- Once the brake piston is re-compressed, remove the old brake pads from the caliper.
They simply "snap" out (for the most part).
- Install new brake pads and make sure they "snap" into place.
NOTE: There are a number of different types of brake pads and wide-range of opinions on which ones are "best".
As with choosing rotors, what's "best" for your car depends on how you drive and whether you use your car for
heavy-duty service (e.g., towing, police pursuit, running moonshine, etc.). The two most common brake pad technologies
available for these cars are semi-metallic & ceramic. Ceramic pads are often perferred in that they
generally generate less dust than other pad types (the dark grey powder that covers your front wheels) and they
are quieter (less sqealing) than some semi-metallic and metallic brake pads. We chose to pay a little extra
and use ceramic pads on our test car. So far, the brakes on our test car are as quiet as a mouse and totally smooth.
- Re-install the brake caliper over the rotor by sliding the top of caliper into the upper caliper frame and
rotating the lower portion of the caliper clockwise and onto the rotor. Re-install the two 10mm caliper
mounting bolts and tighten.
- Remove any lugnuts your may used to secure the rotor during the re-assembly process.
- Re-install the wheel and partially tighten the lugnuts.
- Lower the jack to allow the rear wheel to come in contact with the ground but do not lower the car completely.
- Tighten all lugs nuts using an alternating (star) pattern.
- Lower the car and remove the jack.
- Repeat the process for the other side of the car. If you have any problems or run into any issues please
refer to the Troubleshooting section for this repair.

Congratulations! You just rebuilt your rear brakes and saved yourself some money (and gained the satisfaction
of doing it yourself). After your wash your hands and drink an adult beverage please drop us a line and give us some
feedback on the content of this site. We're always trying to improve our content and we love
getting feedback from fellow Do-It-Yourselfers
|